
This is the final pieces of my work. Please see below to view my entire process.


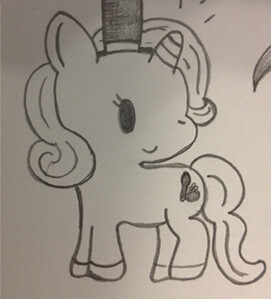
To start off, I had to do some thumbnails. I decided to sketch this and then go with this design. in the end I did not use the top hat though.
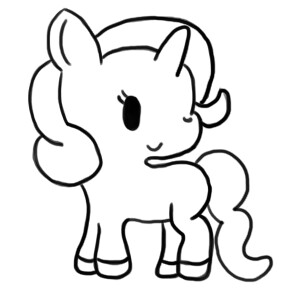
Step #1: This step seems pretty basic. Once you have the design (above) on photoshop, you can use your tablet to simply sketch it out with a black brush to get the black outline.
Step #2: For this part, I wanted to colour the pony pink. I made sure I did the colouring underneath the black lines on another layer. Then I used the quick selection tool to only get the parts inside the pony. Then I used the paint bucket to put the colours in.
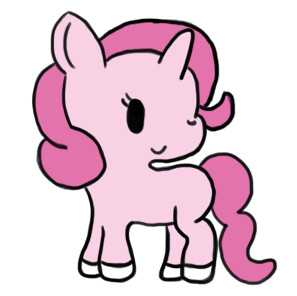
Step #3: This is where I added some shading. Shading can be hard sometimes to figure out where to add it. However you just have to know where abouts you would be getting the sun and go from there. I have made it so that the sun would be on the right hand side shining down. So I made all her shading underneath some lines and mostly on the left.

Step #4: This is for highlights. Because there is shading, there should always be some sort of highlights to show where the light would be as well. So I put the highlights in most of the opposite parts from the shadows. They are on the top. It was made with a lighter pink rather han a complete white. Too white would be too much. Remember to always make these layer underneath the black lines and to use clipping masks. Clipping masks help so much with things like this.
Step #5: Time for the hoofs! I coloured them in black and then made the shading on them. pretty basic and simple. Again using a clipping path.

Step #6: I wanted to add details to the horn since it looked kind of funny before. So I added the black lines and the shading to the horn. This brought it out more and made it look a lot more like a horn.

Step #7: For this part, I set the brush size to about 2. Then drew in a bunch of lines to flow with the mane and tail of the pony. Then I used the smudge tool to make it mix a little better. I made sure darker streaks where close to the bottom and lighter were at the top. I also added the inside of the eye.
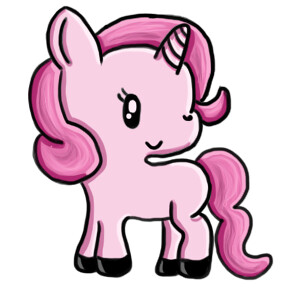
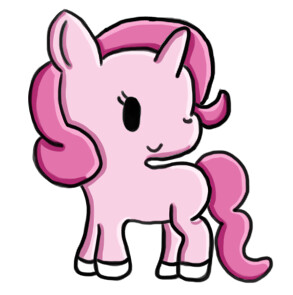
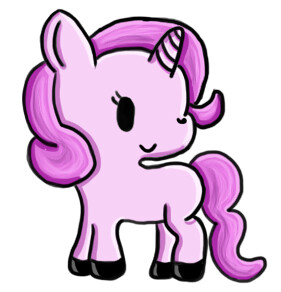
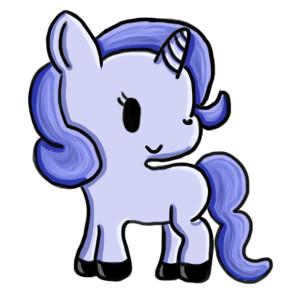
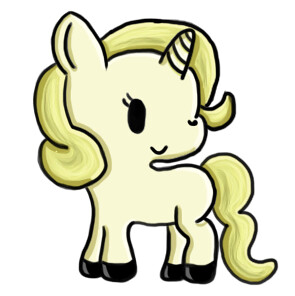
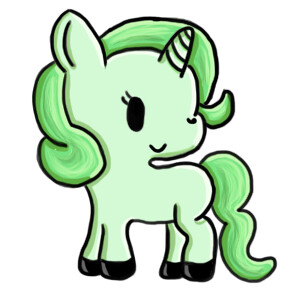
Step #8: After all of this, I wanted to make a set of them in different colours. So for each one I just changed the colouring hue/saturation with each layer. You could also flatten it and change the colour that way as well which is far easier. (keep in mind some of these show that there is no inside of the eye by mistake, however that layer was turned off by accident so it really does have pupils :P). I decided to go with pink, purple, blue, green and yellow for the designs.
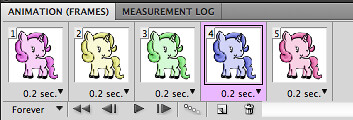
Step #9: Even though I am going to sell these cute little ponies as a set, I have also decided to make a small gif to go with them. I had some spare time and designed them. It is very easy to design a gif in photoshop using the animation frame setting. This is a simple/basic one but I thought it would be cute to go through all the colours. You can edit how fast it goes and I decided to make this one 0.2 seconds because it will be a quick round through the colours. I also changed it to go on forever. In the end, i changed some sizes and made a few different sizes of gifs. I have also shown the working gif of two sizes below.
Thank you and I hope you enjoyed my blog this week on the pony and working gifs!
I find this so adorable! And creative! I just stumbled upon your blog, seems nice! Well, before this gets anymore awkward I better go. lol bye :)
ReplyDeleteI am not sure if my last reply was removed because my computer acted up. If it did you can ignore this lol. However I just wanted to say thank you so much and that I adore comments like this. It is so kind and never awkward :)
Delete